
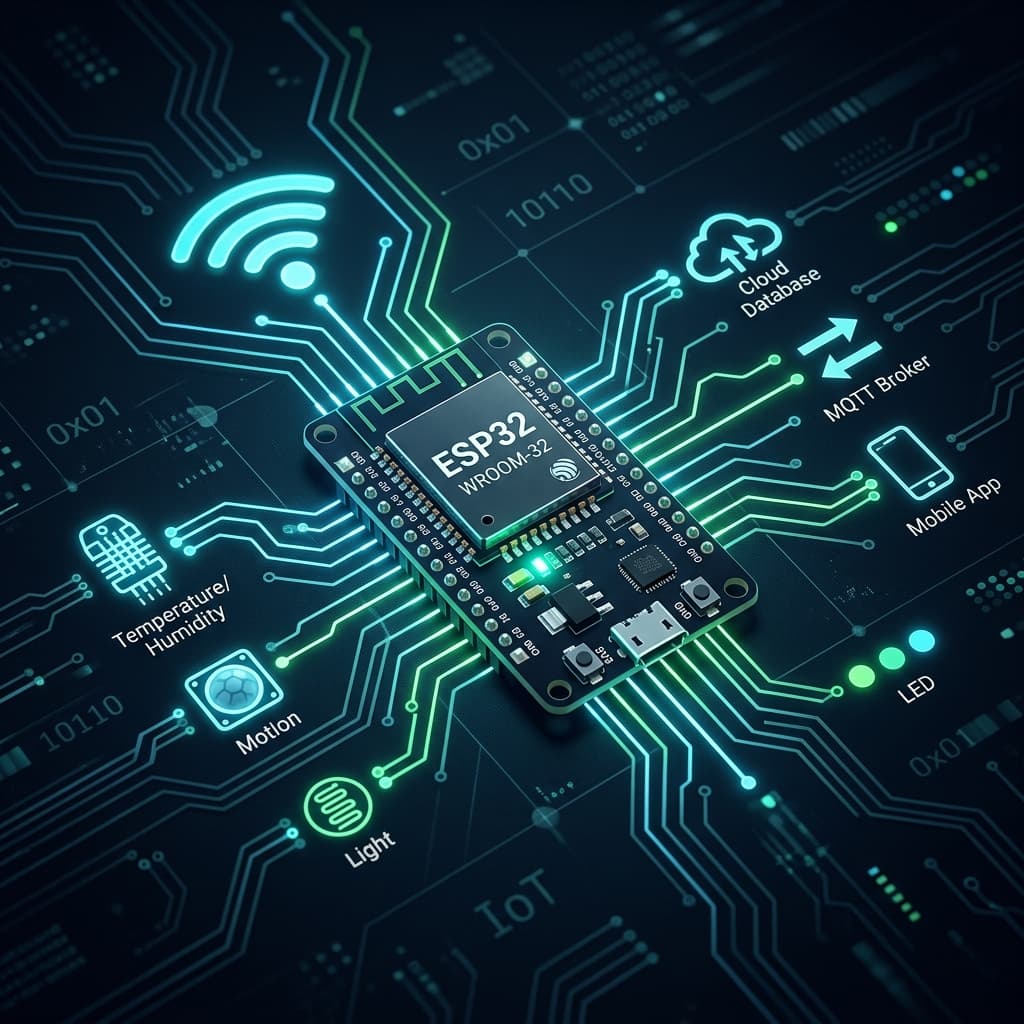

The Internet of Things has transformed from a buzzword into an essential part of modern technology, and at the heart of countless DIY and professional IoT projects sits one remarkable microcontroller: the ESP32. As someone who has spent years tinkering with embedded systems alongside web development, I can confidently say that the ESP32 is the single best platform for anyone looking to dive into IoT development.
In this comprehensive guide, I'll take you from zero to building real-world IoT projects — from blinking an LED to pushing sensor data to the cloud in real-time. Let's get started.
Why ESP32 Is the King of Hobbyist IoT
When I first got into IoT, I started with an Arduino Uno. It was great for learning basics, but the moment I wanted to connect anything to the internet, I hit a wall. Then came the ESP8266, which added Wi-Fi but had limited GPIOs and processing power. The ESP32 solved everything.
Here's why the ESP32 dominates the hobbyist and professional IoT space:
- ●Built-in Wi-Fi and Bluetooth — No need for external modules
- ●Dual-core processor at 240 MHz — Handles multitasking with ease
- ●Rich GPIO selection — 34 programmable pins with ADC, DAC, PWM, I2C, SPI, UART
- ●Ultra-affordable — Around $4-8 per board
- ●Massive community — Thousands of libraries and tutorials available
- ●Low power modes — Deep sleep draws as little as 10µA, perfect for battery projects
ESP32 vs ESP8266 vs Arduino Uno
Before we go further, let's compare the three most popular boards for beginners:
| Feature | Arduino Uno | ESP8266 | ESP32 |
|---|---|---|---|
| Processor | ATmega328P (8-bit) | Tensilica L106 (32-bit) | Xtensa LX6 Dual-Core (32-bit) |
| Clock Speed | 16 MHz | 80 MHz | 240 MHz |
| RAM | 2 KB | 80 KB | 520 KB |
| Flash | 32 KB | 4 MB | 4-16 MB |
| Wi-Fi | None | 802.11 b/g/n | 802.11 b/g/n |
| Bluetooth | None | None | BLE + Classic |
| GPIO Pins | 14 digital, 6 analog | 17 GPIO, 1 ADC | 34 GPIO, 18 ADC |
| Operating Voltage | 5V | 3.3V | 3.3V |
| Price | ~$10 | ~$3 | ~$5 |
| Best For | Learning basics | Simple Wi-Fi projects | Full IoT solutions |
As you can see, the ESP32 wins in nearly every category while maintaining an incredibly low price point. Unless you have a specific reason to use the others, the ESP32 is the clear choice.
Hardware Overview
Let's understand what makes the ESP32 tick. The most common development board is the ESP32-WROOM-32, which packs:
- ●CPU: Xtensa LX6 dual-core processor running at up to 240 MHz
- ●Memory: 520 KB SRAM + 4 MB Flash
- ●Wireless: Wi-Fi 802.11 b/g/n + Bluetooth 4.2 (BLE + Classic)
- ●Peripherals: 18 ADC channels, 2 DAC channels, 10 capacitive touch pins, 16 PWM channels, 3 UART interfaces, 2 I2C buses, 4 SPI buses
- ●Power: Supports deep sleep mode with RTC memory retention
The pin layout can look intimidating at first, but you'll quickly memorize the key pins. Here's what I use most frequently:
- ●GPIO 2: Built-in LED on most boards
- ●GPIO 21/22: Default I2C (SDA/SCL) for sensors
- ●GPIO 5/18/19/23: Default SPI for displays and SD cards
- ●GPIO 34-39: Input-only pins with ADC (great for analog sensors)
- ●GPIO 4: Commonly used for DHT sensors
Setting Up Arduino IDE for ESP32
While there are many ways to program the ESP32 (PlatformIO, ESP-IDF, MicroPython), the Arduino IDE remains the most beginner-friendly option. Here's how to set it up:
Step 1: Install Arduino IDE
Download and install the latest Arduino IDE from [arduino.cc](https://www.arduino.cc/en/software).
Step 2: Add ESP32 Board Support
Open Arduino IDE, go to File → Preferences, and add this URL to the "Additional Board Manager URLs" field:
https://espressif.github.io/arduino-esp32/package_esp32_index.jsonStep 3: Install the ESP32 Board Package
Go to Tools → Board → Boards Manager, search for "ESP32", and install "esp32 by Espressif Systems".
Step 4: Select Your Board
Go to Tools → Board and select "ESP32 Dev Module" (or your specific board variant).
Step 5: Select the Port
Connect your ESP32 via USB, then go to Tools → Port and select the correct COM port. On Windows, it's usually COM3 or COM4. If the port doesn't appear, you may need to install the CP2102 or CH340 USB driver depending on your board.
Project 1: LED Blink — Your First ESP32 Program
Every embedded journey starts with blinking an LED. This simple project verifies your setup and introduces the basic structure of an Arduino sketch.
What you need: - ESP32 development board - USB cable - (Optional) External LED + 220Ω resistor
// Project 1: Blink the built-in LED#define LED_PIN 2
void setup() { // Initialize the LED pin as an output pinMode(LED_PIN, OUTPUT);
// Start serial communication for debugging Serial.begin(115200); Serial.println("ESP32 LED Blink - Starting!"); }
void loop() { // Turn the LED on digitalWrite(LED_PIN, HIGH); Serial.println("LED is ON"); delay(1000); // Wait for 1 second
// Turn the LED off digitalWrite(LED_PIN, LOW); Serial.println("LED is OFF"); delay(1000); // Wait for 1 second } ```
Understanding the code:
- ●
setup()runs once when the ESP32 powers on or resets. We configure GPIO 2 as an output and initialize serial communication at 115200 baud. - ●
loop()runs continuously. We toggle the LED on and off with a 1-second delay between each state. - ●
Serial.println()sends messages to the Serial Monitor (Tools → Serial Monitor), which is invaluable for debugging.
Upload the code by clicking the Upload button (→ arrow). If you see the LED blinking, congratulations — your ESP32 is ready for more advanced projects!
Project 2: Temperature & Humidity Monitoring with DHT22
Now let's build something practical. We'll read temperature and humidity from a DHT22 sensor and display it on the Serial Monitor.
What you need: - ESP32 development board - DHT22 sensor (or DHT11 for a budget option) - 10kΩ pull-up resistor - Breadboard and jumper wires
Wiring: - DHT22 VCC → ESP32 3.3V - DHT22 GND → ESP32 GND - DHT22 DATA → ESP32 GPIO 4 (with 10kΩ pull-up to 3.3V)
First, install the DHT sensor library by Adafruit from the Library Manager (Sketch → Include Library → Manage Libraries).
// Project 2: Temperature & Humidity Monitor#define DHTPIN 4 // GPIO pin connected to DHT22 data pin #define DHTTYPE DHT22 // DHT22 sensor type
DHT dht(DHTPIN, DHTTYPE);
void setup() { Serial.begin(115200); Serial.println("DHT22 Temperature & Humidity Monitor"); Serial.println("=====================================");
dht.begin(); delay(2000); // Give sensor time to stabilize }
void loop() { // Read humidity and temperature float humidity = dht.readHumidity(); float tempC = dht.readTemperature(); // Celsius float tempF = dht.readTemperature(true); // Fahrenheit
// Check if readings are valid if (isnan(humidity) || isnan(tempC) || isnan(tempF)) { Serial.println("ERROR: Failed to read from DHT sensor!"); delay(2000); return; }
// Calculate heat index float heatIndexC = dht.computeHeatIndex(tempC, humidity, false);
// Display readings Serial.println("--- Sensor Reading ---"); Serial.print("Temperature: "); Serial.print(tempC); Serial.print("°C / "); Serial.print(tempF); Serial.println("°F"); Serial.print("Humidity: "); Serial.print(humidity); Serial.println("%"); Serial.print("Heat Index: "); Serial.print(heatIndexC); Serial.println("°C"); Serial.println();
delay(5000); // Read every 5 seconds } ```
Key takeaways:
- Always validate sensor readings with isnan() — sensors can occasionally return bad data
- The DHT22 has a minimum 2-second sampling interval
- The heat index combines temperature and humidity to indicate how hot it actually *feels*
Project 3: Cloud-Connected IoT Dashboard
Here's where things get really exciting. We'll connect our ESP32 to Wi-Fi and send sensor data to a cloud service using MQTT (Message Queuing Telemetry Transport), the standard protocol for IoT communication.
We'll use a free MQTT broker like HiveMQ Cloud or Mosquitto, but the same principles apply to AWS IoT, Google Cloud IoT, or Azure IoT Hub.
// Project 3: Cloud-Connected Temperature Monitor
#include <WiFi.h>
#include <PubSubClient.h>
// Wi-Fi credentials const char* ssid = "YOUR_WIFI_SSID"; const char* password = "YOUR_WIFI_PASSWORD";
// MQTT broker settings const char* mqttServer = "broker.hivemq.com"; const int mqttPort = 1883; const char* mqttTopic = "home/sensors/living-room";
// Sensor configuration #define DHTPIN 4 #define DHTTYPE DHT22
DHT dht(DHTPIN, DHTTYPE); WiFiClient espClient; PubSubClient mqttClient(espClient);
void connectToWiFi() { Serial.print("Connecting to Wi-Fi"); WiFi.begin(ssid, password);
while (WiFi.status() != WL_CONNECTED) { delay(500); Serial.print("."); }
Serial.println(); Serial.print("Connected! IP: "); Serial.println(WiFi.localIP()); }
void connectToMQTT() { while (!mqttClient.connected()) { Serial.print("Connecting to MQTT..."); String clientId = "ESP32-" + String(random(0xffff), HEX);
if (mqttClient.connect(clientId.c_str())) { Serial.println("connected!"); } else { Serial.print("failed (rc="); Serial.print(mqttClient.state()); Serial.println("). Retrying in 5s..."); delay(5000); } } }
void setup() { Serial.begin(115200); dht.begin();
connectToWiFi();
mqttClient.setServer(mqttServer, mqttPort); }
void loop() { if (!mqttClient.connected()) { connectToMQTT(); } mqttClient.loop();
float temp = dht.readTemperature(); float hum = dht.readHumidity();
if (!isnan(temp) && !isnan(hum)) { // Create JSON payload String payload = "{"; payload += "\"temperature\":" + String(temp, 1) + ","; payload += "\"humidity\":" + String(hum, 1) + ","; payload += "\"device\":\"esp32-living-room\""; payload += "}";
// Publish to MQTT topic mqttClient.publish(mqttTopic, payload.c_str());
Serial.print("Published: "); Serial.println(payload); }
delay(10000); // Send data every 10 seconds } ```
This code connects to your Wi-Fi, establishes an MQTT connection, reads sensor data, formats it as JSON, and publishes it to a topic. Any subscriber — a web dashboard, a mobile app, or another ESP32 — can receive this data in real-time.
For a visual dashboard, I recommend pairing this with Node-RED, Grafana, or building a custom dashboard with Next.js and a WebSocket connection to the MQTT broker.
Power Management & Battery Optimization
If you're building battery-powered IoT devices, power management is critical. The ESP32's deep sleep mode is your best friend:
#define uS_TO_S_FACTOR 1000000ULLvoid setup() { Serial.begin(115200);
// Do your work: read sensors, send data readAndSendData();
// Configure deep sleep timer esp_sleep_enable_timer_wakeup(TIME_TO_SLEEP * uS_TO_S_FACTOR);
Serial.println("Going to deep sleep..."); Serial.flush(); esp_deep_sleep_start(); }
void loop() { // This will never execute — deep sleep restarts from setup() } ```
Power consumption comparison:
| Mode | Current Draw | Battery Life (2000mAh) |
|---|---|---|
| Active (Wi-Fi) | ~160 mA | ~12 hours |
| Active (no Wi-Fi) | ~40 mA | ~50 hours |
| Light Sleep | ~0.8 mA | ~104 days |
| Deep Sleep | ~10 µA | ~22 years |
Battery optimization tips:
- Use deep sleep between sensor readings
- Minimize Wi-Fi connection time — connect, send, disconnect
- Use WiFi.mode(WIFI_STA) to disable the access point
- Reduce CPU frequency with setCpuFrequencyMhz(80) when full speed isn't needed
- Use efficient voltage regulators — the onboard ones aren't always optimal
Security Considerations for IoT
IoT security is often overlooked, especially in hobbyist projects. Here are essential practices:
- Use TLS/SSL for MQTT — Never send data over plain MQTT in production. Use port 8883 with
WiFiClientSecureinstead ofWiFiClient.
- Never hardcode credentials — Store Wi-Fi passwords and API keys in a separate
config.hfile that's excluded from version control, or use the ESP32's NVS (Non-Volatile Storage).
- Enable OTA authentication — If you use Over-The-Air updates, always require a password.
- Implement watchdog timers — Prevent your device from hanging:
void setup() { esp_task_wdt_init(30, true); // 30-second watchdog esp_task_wdt_add(NULL); }
void loop() { esp_task_wdt_reset(); // Reset watchdog in each loop // ... your code } ```
- Keep firmware updated — Regularly update your ESP32 Arduino core for security patches.
- Validate all inputs — If your device receives commands via MQTT, validate and sanitize every message before acting on it.
Real-World Project Ideas
Ready to build something amazing? Here are some ideas ranked by difficulty:
Beginner: - Smart night light with motion sensor (PIR + LED) - Door open/close alert system (magnetic reed switch + push notification) - Soil moisture monitor for plants
Intermediate: - Weather station with OLED display and web dashboard - Smart garage door opener with phone control - Air quality monitor (MQ-135 + PM2.5 sensor)
Advanced: - Home automation hub controlling lights, fans, and appliances - Security camera system with ESP32-CAM and motion detection - Autonomous robot with ultrasonic sensors and motor control - GPS tracker for vehicles with SIM800L module
I've personally built several of these, and the weather station is my favorite starter project because it combines sensors, displays, Wi-Fi, and cloud connectivity into one satisfying build.
Conclusion
The ESP32 has democratized IoT development in a way that no other platform has. For under $10 in hardware, you can build devices that would have required hundreds of dollars and professional engineering knowledge just a decade ago.
Whether you're a web developer looking to explore hardware, a student learning embedded systems, or a maker with ambitious project ideas, the ESP32 paired with the Arduino ecosystem gives you everything you need to bring your ideas to life.
Start with the LED blink. Move to sensors. Connect to the cloud. Before you know it, you'll be building smart home systems and monitoring dashboards that impress everyone who sees them.
The world of IoT is wide open — go build something awesome!
Comments
0 comments
Leave a Comment